This post may contain affiliate links, including those from Amazon Associates. If you make a purchase through these links, I may earn a commission at no additional cost to you. Learn more about our affiliate policy.
I’ve daydreamed for years about cultivating a more self-sufficient lifestyle but felt limited by living in a city. When I visited my Sunday farmer’s market, I was enamored with the fresh vegetables and herbs the vendors had to offer. It felt like homesteading was a privilege reserved for those with acres of land and endless time.
But I learned you don’t need a sprawling backyard to start your urban homesteading journey. Even the coziest apartments and smallest outdoor spaces hold untapped potential to develop these skills.

Whether you have a sunny balcony, a modest patch of grass, or simply a kitchen counter to work with, there are countless ways to embrace sustainability and develop homesteading skills right where you are.
In this post, I’ll share 14 easy and beginner-friendly urban homesteading projects you can start this year. From growing your own microgreens to crafting DIY natural cleaners, these ideas are designed to inspire and empower you, even if you’re starting small.
I hope these ideas turn your daydreams into action to create a slice of homesteading heaven in your city sanctuary.
1. Start a Mini Herb Garden

Growing your own herbs is a simple way to add freshness to your meals while bringing a touch of greenery to your space. With just a few small containers and some sunlight, you can have a thriving herb garden on your windowsill or balcony.
- Choose Containers: Use mason jars, small pots, or hanging planters with drainage (add pebbles if needed).
- Pick Easy Herbs: Start with easy to grow herb options like basil, mint, or parsley either pre-potted or from seeds.
- Find Sunlight: Place your herbs where they’ll get 4-6 hours of light daily.
- Water Lightly: Water when the top inch of soil feels dry to avoid overwatering.
- Harvest Often: Snip leaves regularly to promote new growth and keep your plants healthy.
Personal Tip: When I started my herb garden, I lined up mason jars on my kitchen windowsill. Seeing that little row of green every morning made me feel like I was already winning at homesteading. For extra charm, wrap your jars in twine or add chalkboard labels for a rustic touch.
Find creative ideas for indoor vertical herb gardens here.
2. Create a Vertical Garden

If you’re short on space but big on gardening dreams, a vertical garden is the perfect solution. Using a wooden pallet or hanging organizers, you can grow vegetables, flowers, or succulents without taking up much room. Y
ou can have a vertical hanging garden either outdoors or indoors, just make sure it is in a spot that gets plenty of sun. Here are 12 DIY ideas for outdoor vertical gardens.
- Choose your structure: Repurpose a wooden pallet, use hanging shoe organizers, or buy a vertical planter system.
- Pick your plants: Vegetables like lettuce and strawberries or herbs like thyme and oregano thrive in vertical setups. You can also add colorful flowers or succulents for variety.
- Prepare your soil: Fill each pocket or planter with nutrient-rich potting soil.
- Find the perfect spot: Hang or lean your vertical garden in a sunny location with easy access to water.
- Maintain regularly: Water evenly to keep soil moist and prune plants as needed for healthy growth.
Personal tip: When I built my first vertical garden, I used an old pallet and painted it a soft green to match my balcony. Watching lettuce leaves and tiny strawberries peek out of the slots felt so rewarding, like turning a wall into a living masterpiece!
3. Compost in Small Spaces
Composting is a fantastic way to reduce kitchen waste and create nutrient-rich soil for your plants, even if you’re short on space. A compact compost bin can fit right into your apartment or balcony setup.
- Choose your bin: Use a small plastic container with a lid, a bucket, or a store-bought compact compost bin designed for indoor use.
- Add the right materials: Include fruit and veggie scraps, coffee grounds, eggshells, and shredded paper. Avoid meat, dairy, and oily foods to prevent odors.
- Layer and mix: Alternate between “greens” (wet materials like food scraps) and “browns” (dry materials like paper or leaves) to balance your compost. Stir occasionally to aerate.
- Place strategically: Keep your bin in a well-ventilated area, like under the sink or on a balcony.
- Harvest your compost: In a few weeks to months, you’ll have nutrient-rich compost ready for your garden or potted plants.
Personal tip: My first composting attempt felt intimidating, but I started small with a repurposed container under my sink. Adding a layer of shredded newspaper on top helped keep odors away and made the process surprisingly simple.
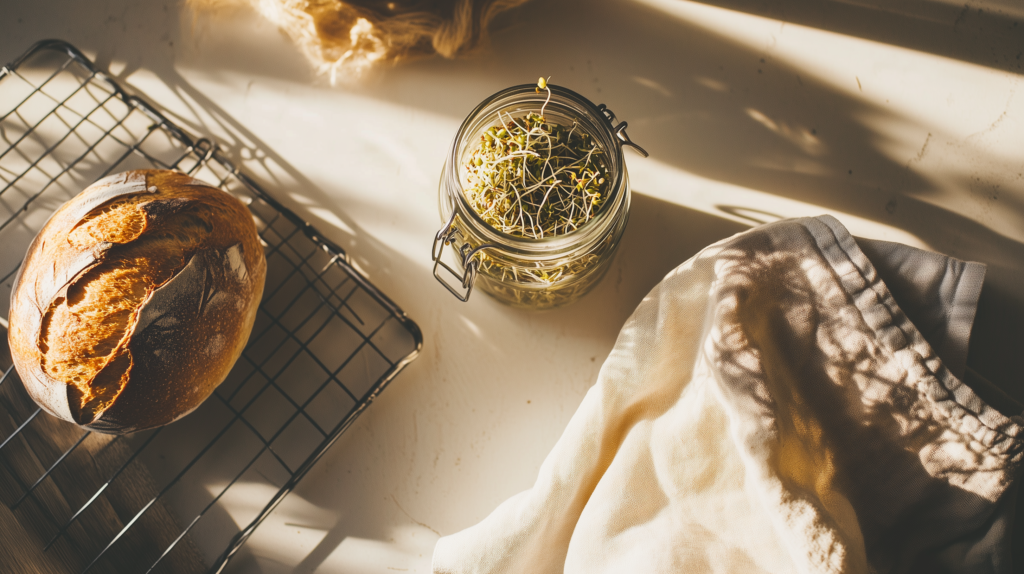
4. Grow Sprouts in Your Kitchen

If you’re looking for a quick and easy way to add fresh nutrients to your meals, growing sprouts is the perfect kitchen project. With just a mason jar and some seeds, you can have a batch of fresh sprouts in a matter of days.
- Choose your seeds: Start with alfalfa, broccoli, or mung beans—these are beginner-friendly and packed with nutrients.
- Prepare your jar: Use a mason jar with a breathable lid (or cover the jar with a piece of mesh secured by a rubber band).
- Soak and rinse: Soak the seeds overnight, then drain the water and rinse them twice a day.
- Find the right spot: Keep the jar at room temperature and out of direct sunlight.
- Harvest quickly: Your sprouts will be ready in just 3–5 days! Give them a final rinse before adding them to salads, sandwiches, or stir-fries.
Personal tip: The first time I grew sprouts, I used a mason jar with a mesh lid, and it amazed me how fast they grew. Seeing those tiny shoots each morning felt like a small miracle—plus, they made my meals taste fresher and more vibrant!
5. Make or Use DIY Beeswax Wraps

Ditch single-use plastic wrap by switching to reusable beeswax wraps. These are a sustainable, natural alternative you can easily make at home and cuts down on the plastic that may leach into your food. These wraps are perfect for covering bowls, wrapping snacks, or storing produce.
- Gather materials: Use cotton fabric (cut into squares), beeswax pellets, parchment paper, and a baking sheet.
- Prepare the wrap: Place fabric on the baking sheet, sprinkle beeswax pellets evenly, and cover with another piece of parchment paper.
- Melt the wax: Bake at 200°F (93°C) for 5-10 minutes until the wax melts completely.
- Spread the wax: Use a brush to evenly distribute the wax, then let the wrap cool and harden.
- Use and reuse: Press the wraps around bowls or food using the warmth of your hands to seal.
Personal tip: I started with pre-made beeswax wraps from Bee’s Wraps before making my own, and now I’m hooked! Customizing fabric patterns adds a fun, personal touch—plus, it feels great to reduce plastic waste in such an easy way.

Bee’s Wrap Reusable Beeswax Food Wraps are a must-have for beginner urban homesteaders looking to reduce waste and embrace sustainable living. Made in the USA from organic cotton, beeswax, plant oil, and tree resin, these washable, compostable wraps keep food fresh without plastic—perfect for a more self-sufficient, eco-friendly kitchen.

6. Bake Sourdough Bread

Embarking on a sourdough journey felt so empowering to me. With just flour, water, and a bit of patience, you can create your own sourdough starter and bake flavorful bread that is free from seed oils and additives.
- Make your starter: Combine equal parts flour and water in a jar, then let it sit at room temperature. Feed it daily by discarding half and adding fresh flour and water until it bubbles and doubles in size (about 5–7 days).
- Maintain your starter: Keep it in the fridge between uses, feeding it weekly to keep it active.
- Bake your first loaf: For a beginner-friendly recipe, check out this detailed guide from Farmhouse on Boone. It walks you through the entire process step by step.
- Use the discard: Don’t let that extra starter go to waste! Try it in pancakes, crackers, or even homemade pizza dough.
Personal tip: My first sourdough loaf felt like a major accomplishment, even if it wasn’t bakery-perfect. Watching the starter come to life was a fun, hands-on experience that made my kitchen feel like a little homesteading haven.
Find the full guide to making sourdough bread in a small kitchen here.
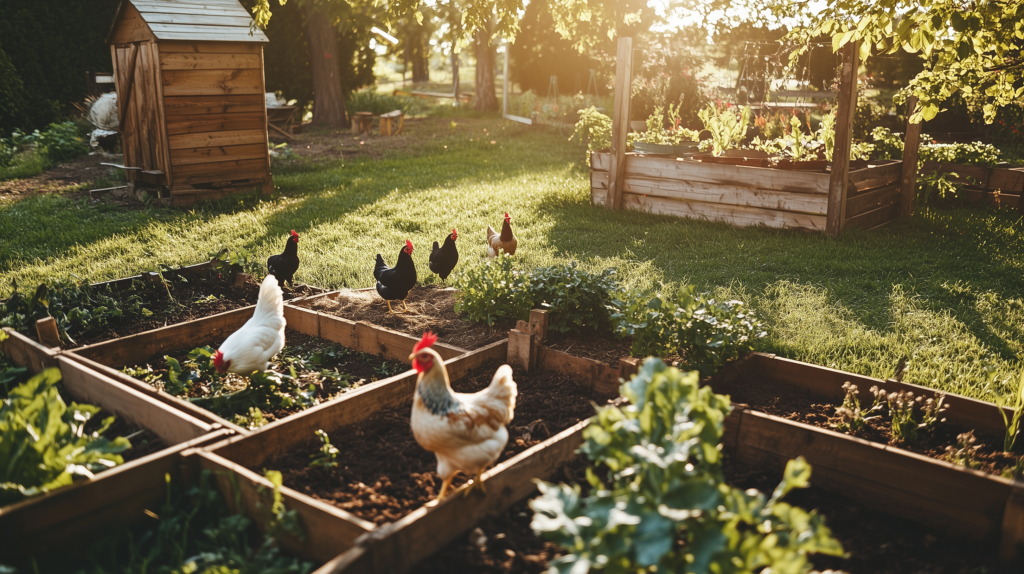
7. Build a Raised Garden Bed

A raised garden bed is a perfect solution for growing vegetables and herbs, even in small spaces like balconies or patios. With a few simple materials, you can create a productive mini-garden that fits your homesteading goals.
- Choose your materials: Use wooden crates, repurposed wood, or even metal troughs to build a sturdy and affordable bed. For more inspiration, check out these 7 Affordable DIY Raised Garden Bed Ideas.
- Pick fast-growing crops: Radishes, leafy greens, or herbs thrive in raised beds and are ideal for quick harvesting.
- Prepare the soil: Fill your bed with nutrient-rich soil or a mix of compost and topsoil.
- Water and maintain: Keep the soil evenly moist and fertilize occasionally for healthy, abundant growth.
Personal tip: My first raised garden bed was a small crate on my patio, and it completely changed how I felt about gardening. Growing fresh radishes and greens was surprisingly satisfying, and the small size made it so easy to manage.
8. Create a Small Pollinator Garden

Bring life to your balcony or small outdoor space by starting a low-maintenance pollinator garden. Flowers like marigolds, lavender, and zinnias not only brighten up your space but also attract essential pollinators like bees and butterflies.
- Pick your plants: Choose native flowers that thrive in small spaces and support local pollinators. Marigolds, lavender, zinnias, and coneflowers are great options.
- Choose containers: Use small pots, hanging planters, or window boxes to fit your space.
- Arrange thoughtfully: Group flowers with similar sunlight and watering needs for easy care.
- Water and feed: Keep the soil moist but not waterlogged, and use organic fertilizer to encourage blooms.
- Enjoy the visitors: Watch as your garden becomes a haven for bees, butterflies, and even hummingbirds.
Personal tip: When I planted my first pollinator garden in pots on my balcony, the sight of butterflies flitting around brought so much joy. Adding lavender not only drew in pollinators but also made the space smell amazing.
9. Make Natural Cleaning Products

Switching to natural cleaning products is a simple way to reduce toxins in your home while saving money. With just a few pantry staples, you can make effective, non-toxic cleaners that work for nearly every surface.
- Gather ingredients: Stock up on white vinegar, baking soda, essential oils, and distilled water.
- Make an all-purpose spray: Mix 1 cup of distilled water, 1 cup of vinegar, and 10–15 drops of your favorite essential oil (like lemon or tea tree) in a spray bottle. Shake well before each use.
- Create a bathroom cleaner: Combine ½ cup of baking soda with enough vinegar to form a paste. Apply to surfaces, scrub, and rinse clean.
- Store properly: Keep your cleaners in labeled glass spray bottles to maintain their potency and avoid chemical leaching.
- Find more recipes: For a full guide to homemade cleaning products, check out these 9 DIY natural cleaning recipes.
Personal tip: I started with a simple all-purpose spray, and it quickly became my go-to for everything from countertops to mirrors. Adding a few drops of lemon essential oil made my home smell fresh and inviting.
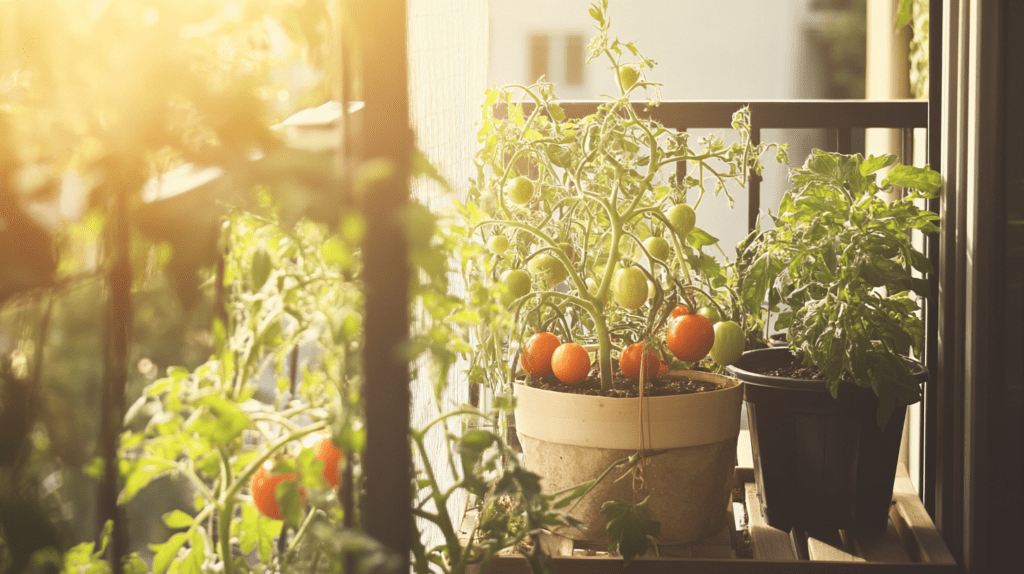
10. Start a Balcony Vegetable Garden

Growing vegetables on your balcony is an easy way to enjoy fresh, homegrown produce, even in a small space. With the right setup, you can harvest compact crops like cherry tomatoes, peppers, or bush beans all season long.
- Choose compact vegetables: Opt for space-saving varieties like cherry tomatoes, dwarf peppers, bush beans, or even salad greens.
- Pick the right pots: Use self-watering pots to make maintenance easier and ensure consistent moisture for your plants.
- Prepare the soil: Fill your pots with nutrient-rich potting soil or a mix of compost and soil.
- Place strategically: Position your garden in a spot that gets at least 6 hours of sunlight each day.
- Water and fertilize: Check the soil regularly and water as needed. Use an organic fertilizer to keep your plants thriving.
My first balcony vegetable garden included a single cherry tomato plant in a self-watering pot, and it produced way more tomatoes than I expected! Along the way, I learned some game-changing balcony gardening secrets that made the process even easier.
11. Sew Reusable Bags or Napkins

Making your own reusable grocery bags or cloth napkins is a fun and eco-friendly way to upcycle old fabric or thrifted materials. This simple project reduces waste while adding a personal touch to your everyday essentials.
- Choose your fabric: Use durable materials like old jeans or canvas for bags, and lightweight cotton or linen for napkins.
- Sew or no-sew: If you sew, stitch together simple rectangles for napkins or add straps for bags. For a no-sew option, use fabric glue or cut T-shirt fabric into tote bag shapes without stitching.
- Personalize: Add decorative touches like fabric paint, stencils, or trim to make your creations unique.
- Test durability: For grocery bags, check that your seams or glued edges can handle weight before using.
Personal tip: I started with no-sew T-shirt bags and was surprised by how easy and sturdy they were! Later, I learned some simple sewing techniques that helped me create matching cloth napkins for my table.
12. Learn to Preserve Food

Preserving food is a rewarding way to make the most of seasonal produce and reduce waste. Start with simple methods like freezing herbs or making small-batch jams that require minimal equipment and time.
- Freeze herbs in olive oil: Chop fresh herbs, place them in an ice cube tray, and fill with olive oil. Once frozen, transfer the cubes to a freezer bag for easy use in cooking.
- Make small-batch jam: Combine 2 cups of chopped seasonal fruit, ½ cup of sugar, and a squeeze of lemon juice in a saucepan. Simmer until thickened, about 15–20 minutes. Store in a clean jar in the fridge.
- Try pickling: Quick pickling vegetables is another easy preservation method. It’s a simple way to transform fresh produce into tangy, long-lasting treats for your pantry.
- Label and store: Always label jars and bags with the date to keep track of freshness.
Personal tip: My first attempt at food preservation was fridge pickling cucumbers in summer with just water and apple cider vinegar. This was a refreshing treat on a hot day!
Last Thoughts
Urban homesteading may seem like a daunting task at first, but as these 12 projects show, it’s entirely possible to live more sustainably and self-sufficiently, even in the middle of the city. Every intentional step adds up to a healthier, more sovereign lifestyle.
Pick one or two projects from this list to try this weekend, and before you know it, you’ll be well on your way to creating a homestead that fits your space and life.
What will you try first? Let us know in the comments, and don’t forget to explore more homesteading tips and guides right here on the blog. Happy homesteading!