This post may contain affiliate links, including those from Amazon Associates. If you make a purchase through these links, I may earn a commission at no additional cost to you. Learn more about our affiliate policy.
I absolutely LOVE pickled vegetables. The sweet and tangy alchemy that happens when you add vinegar, water and honey together and let fresh vegetables from your garden do their thing.
If you’ve ever thought you needed fancy equipment to preserve your harvest, let me reassure you: quick pickling is one of the simplest and most rewarding ways to enjoy your garden’s bounty. It is one of the easiest ways to preserve vegetables without canning.

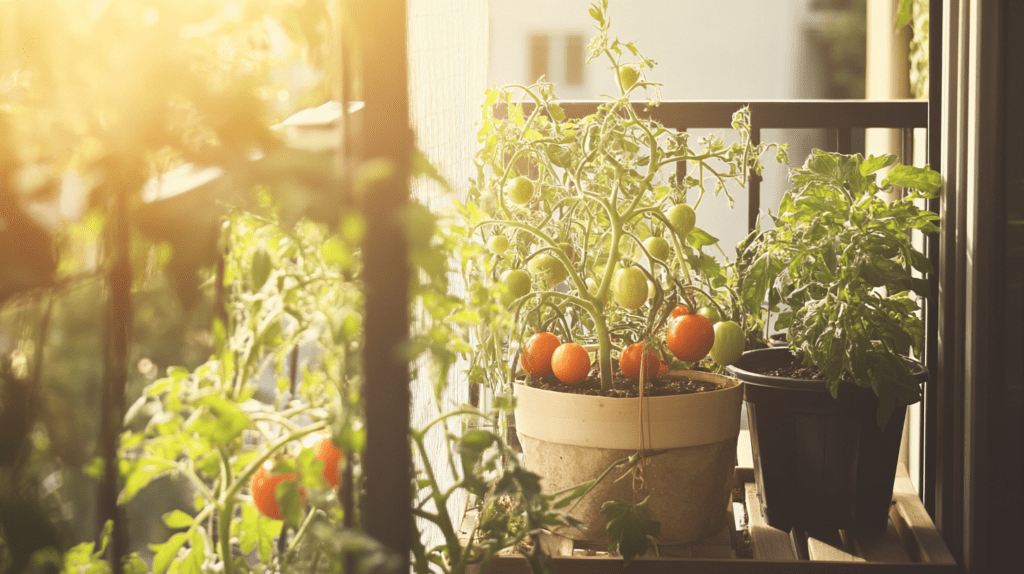
It’s perfect for urban gardeners with limited space and busy schedules. Best of all, you don’t need a pantry full of supplies, just a jar, some vinegar, and a pinch of creativity.
In this post, I’ll walk you through seven easy recipes for quick pickled vegetables, each designed with beginner urban homesteaders in mind.
Whether you’re looking for a spicy kick, a tangy crunch, or a sweet twist, you’ll find a recipe to suit your taste buds. By the end, you’ll be inspired to whip up a jar of pickles this weekend and experience the simple joy of turning your fresh produce into something truly special.
Benefits of Quick Pickling for Urban Homesteaders
Quick pickling is the easiest way for urban and apartment homesteaders to practice sustainable living while making the most of their harvest. Here’s why it’s such a game-changer:
- Easy to Learn: Quick pickling doesn’t require special skills or equipment, making it perfect for beginners. All you need is a jar, some vinegar, and a few basic spices to get started.
- Saves Money: Have extra vegetables from your urban garden or the farmer’s market? Instead of letting them go to waste, transform them into delicious pickled treats. It’s a budget-friendly way to preserve your seasonal bounty.
- Encourages Sustainability: Quick pickling supports sustainable living by reducing food waste and making the most of what you grow – even in a small backyard or balcony garden.
- Promotes Healthy Eating: Unlike store-bought pickles, which can be loaded with preservatives and additives, homemade pickles allow you to control every ingredient. Quick pickling preserves nutrients and creates a tangy, probiotic-rich snack that supports a healthy gut microbiome, promoting better digestion and overall wellness.
The Basics of Quick Pickling
Quick Pickling Formula
The basic formula for a quick pickle brine is:
- 1 cup water
- 1 cup vinegar (white vinegar or apple cider vinegar work well)
- 1 tablespoon salt
- 1 tablespoon sugar or 1 ½ tablespoons honey (for a natural sweetness)
Sugar creates a classic sweet-tangy balance, while honey offers a slightly milder, richer flavor. Choose the one that suits your taste or experiment with both to find your favorite!
Tools Needed
To get started with quick pickling, you’ll need a few basic tools:
- Mason jars with lids
- A saucepan for heating the brine
- A knife and cutting board for prepping vegetables

How to Prepare Vegetables for Pickling
Prepping Your Veggies for the Perfect Pickle
Preparing your vegetables properly is the key to achieving flavorful, crisp pickles. Follow these simple steps to get started:
- Choose Fresh Produce: For the best results, use freshly harvested vegetables from your garden or pick up seasonal produce from a local farmer’s market. Fresher vegetables mean better texture and flavor in your pickles.
- Wash and Slice: Thoroughly wash your vegetables to remove any dirt or debris. Slice them into uniform sizes to ensure they pickle evenly and absorb the brine consistently. Always aim for even thickness.
- Blanch Sturdier Vegetables (Optional): For firmer vegetables like carrots or green beans, consider blanching them briefly in boiling water before pickling. This step softens their texture slightly, allowing the brine to penetrate more effectively while keeping them crisp.
Once your vegetables are prepped, you’re ready to combine them with your brine and start the pickling process!
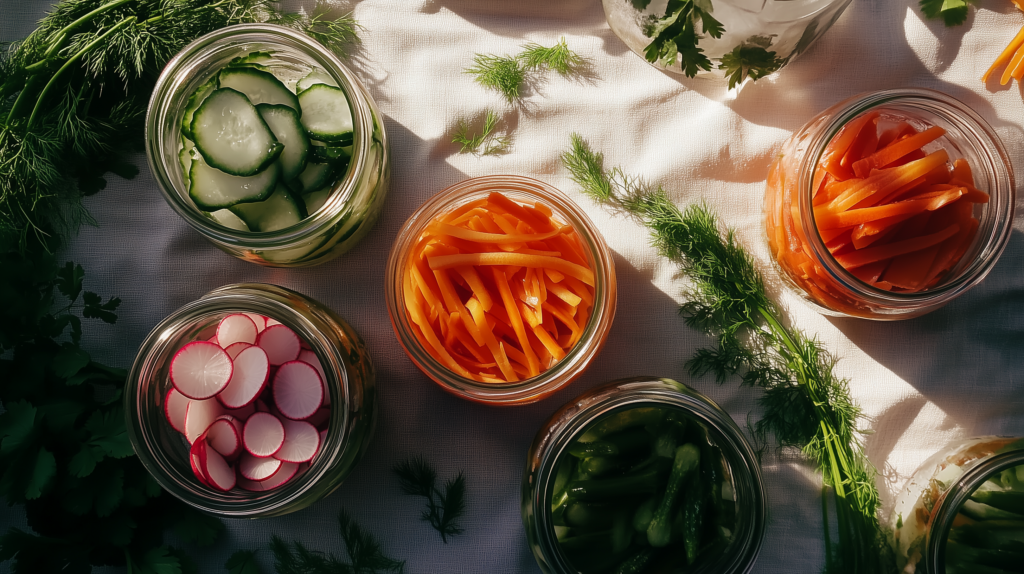
7 Quick Pickled Vegetable Recipes
Pickled Cucumbers (Classic Dill Pickles)

Why You’ll Love it: The quintessential pickle is perfect for beginners and a great way to start your pickling journey. I keep a jar of these in the fridge all summer long for a cooling treat!
Ingredients:
- 1 pound small pickling cucumbers
- 2 cups water
- 2 cups white vinegar
- 2 tablespoons salt
- 1 tablespoon sugar or 1 ½ tablespoons honey
- 3 garlic cloves, sliced
- 1 teaspoon mustard seeds
- 4–5 sprigs of fresh dill
Instructions:
- Vegetable Prep: Wash the cucumbers and slice into spears or rounds, depending on your preference.
- Make the Brine: In a saucepan, combine water, vinegar, salt, and sugar (or honey). Bring to a boil, then simmer until the salt and sugar dissolve.
- Assemble the Jar: Place garlic, mustard seeds, and dill into a mason jar. Pack the cucumber slices tightly but leave some space at the top.
- Add the Brine: Pour the hot brine over the cucumbers, covering them completely. Seal the jar and let it cool to room temperature before refrigerating.
Variation: For a spicier version, add a pinch of red pepper flakes to the brine.
Spicy Pickled Carrots

Why You’ll Love it: Add a spicy kick to your salads or enjoy as a flavorful snack.
Ingredients:
- 1 pound carrots, peeled
- 2 cups water
- 2 cups apple cider vinegar
- 1 tablespoon salt
- 1 tablespoon sugar or 1 ½ tablespoons honey
- 1 teaspoon red pepper flakes
- 1 teaspoon coriander seeds
- 3 garlic cloves, sliced
Instructions:
- Vegetable Prep: Cut carrots into thin sticks for easy snacking. Optional: Blanch them in boiling water for 1–2 minutes for a softer texture.
- Make the Brine: Combine water, vinegar, salt, and sugar (or honey) in a saucepan. Heat until dissolved.
- Assemble the Jar: Layer the carrots, garlic, red pepper flakes, and coriander seeds in a mason jar.
- Add the Brine: Pour the hot brine over the carrots, ensuring they are fully submerged. Seal the jar and let cool before refrigerating.
Variation: Add a slice of fresh ginger to the jar for an Asian-inspired flavor.
Sweet and Tangy Pickled Red Onions

Why You’ll Love it: These quick pickles are a versatile condiment, perfect for tacos, sandwiches, or grain bowls.
Ingredients:
- 2 medium red onions, thinly sliced
- 1 cup water
- 1 cup white vinegar
- 1 tablespoon salt
- 2 tablespoons sugar or 3 tablespoons honey
- 1 bay leaf
- 1 teaspoon black peppercorns
Instructions:
- Vegetable Prep: Peel and slice the red onions into thin rounds or half-moons.
- Make the Brine: Heat water, vinegar, salt, and sugar (or honey) in a saucepan until dissolved.
- Assemble the Jar: Add the bay leaf and peppercorns to a mason jar. Pack the sliced onions tightly.
- Add the Brine: Pour the hot brine over the onions, ensuring they are completely covered. Seal the jar and refrigerate.
Bonus Tip: These onions are ready to eat in just 30 minutes!
Zesty Pickled Radishes

Why You’ll Love it: Radishes absorb the brine quickly, making them perfect for fast pickling.
Ingredients:
- 1 bunch radishes (about 10–12), thinly sliced
- 1 cup water
- 1 cup apple cider vinegar
- 1 tablespoon salt
- 1 tablespoon sugar or 1 ½ tablespoons honey
- 1 teaspoon black peppercorns
- 2 garlic cloves, sliced
- 2–3 sprigs of fresh dill
Instructions:
- Vegetable Prep: Wash and thinly slice the radishes.
- Make the Brine: Heat water, vinegar, salt, and sugar (or honey) in a saucepan until dissolved.
- Assemble the Jar: Place garlic, peppercorns, and dill into a mason jar. Add the radish slices.
- Add the Brine: Pour the hot brine over the radishes, ensuring they are fully covered. Seal and refrigerate.
Variation: Add a teaspoon of honey for a slightly sweeter flavor.
Curried Pickled Cauliflower

Why You’ll Love it: A bold, flavorful snack or side dish with vibrant spices.
Ingredients:
- 1 small head of cauliflower, cut into bite-sized florets
- 2 cups water
- 2 cups white vinegar
- 1 tablespoon salt
- 1 tablespoon sugar or 1 ½ tablespoons honey
- 1 teaspoon curry powder
- ½ teaspoon turmeric
- 1 teaspoon mustard seeds
Instructions:
- Vegetable Prep: Cut cauliflower into small florets and blanch in boiling water for 2 minutes.
- Make the Brine: Heat water, vinegar, salt, sugar (or honey), curry powder, turmeric, and mustard seeds in a saucepan until dissolved.
- Assemble the Jar: Add the cauliflower to a mason jar and pour the hot brine over it.
- Add the Brine: Ensure the cauliflower is fully submerged. Seal the jar and refrigerate.
Bonus Tip: Add carrot or celery sticks for a mixed vegetable pickle.
Garlicky Pickled Green Beans

Why You’ll Love it: Perfect for snacking or garnishing cocktails like a Bloody Mary.
Ingredients:
- 1 pound green beans, trimmed
- 2 cups water
- 2 cups white vinegar
- 1 tablespoon salt
- 1 tablespoon sugar or 1 ½ tablespoons honey
- 3 garlic cloves, sliced
- 1 teaspoon red pepper flakes
- 2 sprigs fresh dill
Instructions:
- Vegetable Prep: Trim the ends of the green beans. Optional: Blanch them in boiling water for 2 minutes.
- Make the Brine: Combine water, vinegar, salt, and sugar (or honey) in a saucepan. Heat until dissolved.
- Assemble the Jar: Pack the green beans vertically in a mason jar with garlic, red pepper flakes, and dill.
- Add the Brine: Pour the hot brine over the green beans. Seal the jar and refrigerate.
Variation: Add lemon zest for a bright, citrusy flavor.
Pickled Bell Peppers

Why You’ll Love it: Sweet and tangy peppers are perfect for antipasto platters or sandwiches.
Ingredients:
- 4 medium bell peppers (mixed colors), sliced into strips
- 2 cups water
- 2 cups white vinegar
- 1 tablespoon salt
- 1 tablespoon sugar or 1 ½ tablespoons honey
- 1 teaspoon oregano
- 1 teaspoon basil
- 3 garlic cloves, sliced
Instructions:
- Vegetable Prep: Wash the peppers and slice them into strips.
- Make the Brine: Heat water, vinegar, salt, and sugar (or honey) in a saucepan until dissolved.
- Assemble the Jar: Add garlic, oregano, and basil to a mason jar. Pack the pepper strips inside.
- Add the Brine: Pour the hot brine over the peppers, ensuring they are fully submerged. Seal and refrigerate.
Bonus Tip: Use a mix of red, yellow, and green peppers for a colorful jar.
Storing and Using Your Pickled Vegetables
How to Store Your Quick Pickles
Storing your quick pickles is simple and ensures they stay fresh and delicious.
- Store in the Fridge: Quick pickles are not shelf-stable and must be stored in the refrigerator. They typically last up to two weeks, though their flavor is best within the first week.
- Label Your Jars: Write the date on your jars to keep track of their freshness. This makes it easy to know when to enjoy them at their peak flavor.
With proper storage, you can enjoy your pickled vegetables for weeks to come while savoring the taste of your garden’s harvest.

Creative Ways to Enjoy Your Pickled Vegetables
Quick pickles are incredibly versatile and can be enjoyed in a variety of ways. Here are some ideas to inspire you:
- Pair with Charcuterie Boards: Add an assortment of pickled vegetables to your charcuterie board for a tangy, colorful addition.
- Top Sandwiches or Burgers: Use pickled cucumbers, onions, or peppers to elevate your favorite sandwich or burger with a burst of flavor.
- Enhance Tacos or Grain Bowls: Pickled onions and radishes make excellent toppings for tacos, grain bowls, or salads, adding a zesty crunch.
Experiment with these ideas or create your own combinations to bring vibrant flavor to your meals! Quick pickles are a simple way to add excitement to everyday dishes.
Conclusion
Quick pickling is a simple and rewarding way to preserve your harvest, add bold flavors to your meals, and embrace sustainable living, even in an urban setting. With just a few ingredients and minimal effort, you can create delicious pickled vegetables that elevate your dishes and reduce food waste.
Try one of these recipes this weekend and experience the joy of homemade pickles. Don’t forget to share your creations and inspire others to join in on this flavorful journey!