This post may contain affiliate links, including those from Amazon Associates. If you make a purchase through these links, I may earn a commission at no additional cost to you. Learn more about our affiliate policy.
How often do we toss out everyday objects without a second thought, even though it might have potential for a second life?
I used to do it all the time. But when I started looking at “trash” as a chance to get creative and make something beautiful, I started seeing potential in these mundane items.
Now, instead of throwing away glass jars, wine corks, or cardboard boxes, I see them as opportunities to craft eco-friendly decor that adds a rustic elegant touch to my home while reducing waste.
It’s part of creating more sustainable lifestyle habits, where simple swaps and mindful choices can make a big difference over time. In fact, you might be surprised how easy it is to incorporate these kinds of ideas into your daily routine.
How to Turn Everyday Trash into Modern Elegance
When people hear “eco-friendly crafts” or “upcycled decor,” they sometimes picture items that look a little… unfinished. Maybe even a little too “DIY.”
But here’s the thing: with a bit of creativity and your own unique spin, those everyday items we usually throw away like wine bottles, cardboard boxes, or old picture frames can be transformed into something truly beautiful.
The secret is in the details. By adding natural textures, like twine or pressed flowers, or using thoughtful color schemes, you can create pieces that feel intentional, elegant, and timeless.
Upcycled crafts can be a reflection of your style and a sustainable way to make your home feel more personalized and serene.
In this post, you’ll find nine inspiring ideas that prove sustainable home decor can be both eco-friendly and add rustic charm to your home. So grab your materials (you probably already have them on hand) and let’s get started on making trash into treasure!
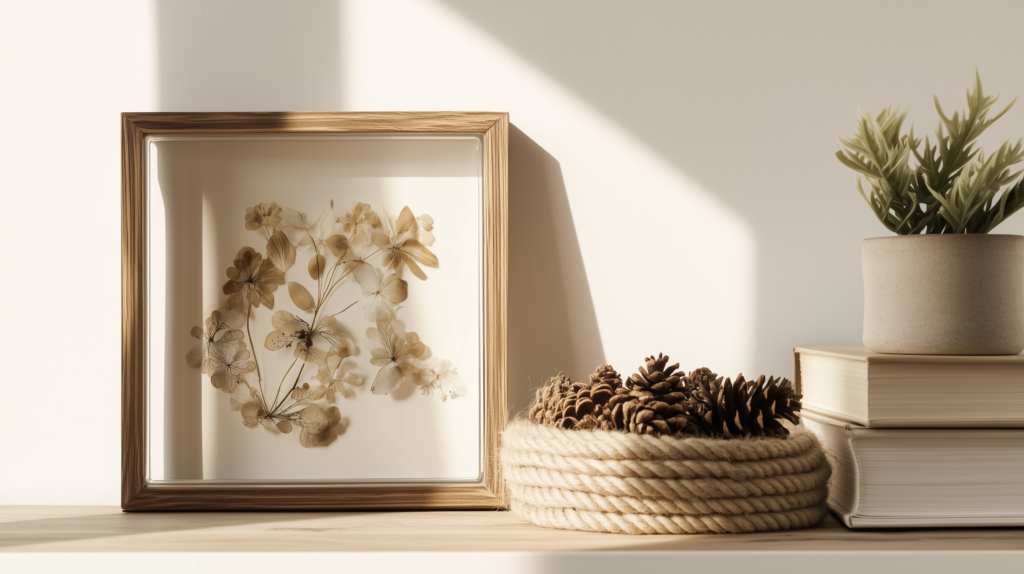
1. Pressed Flower Glass Frames

Why toss old picture frames when you can transform them into elegant displays of nature’s beauty? This project combines the simplicity of pressed flowers with the sleekness of recycled glass.
What You’ll Need: Two pieces of glass from old picture frames, pressed flowers or leaves, binder clips, or a recycled frame.
Steps:
- Arrange your pressed flowers or leaves on one piece of glass.
- Gently place the second piece of glass over the arrangement, ensuring the edges align.
- Secure the two panes together using binder clips or place them back into a frame.
- Display your pressed flower masterpiece on a windowsill or hang it on the wall.
Pro Tip: Swap out the flowers seasonally to keep your décor feeling fresh and in sync with nature.
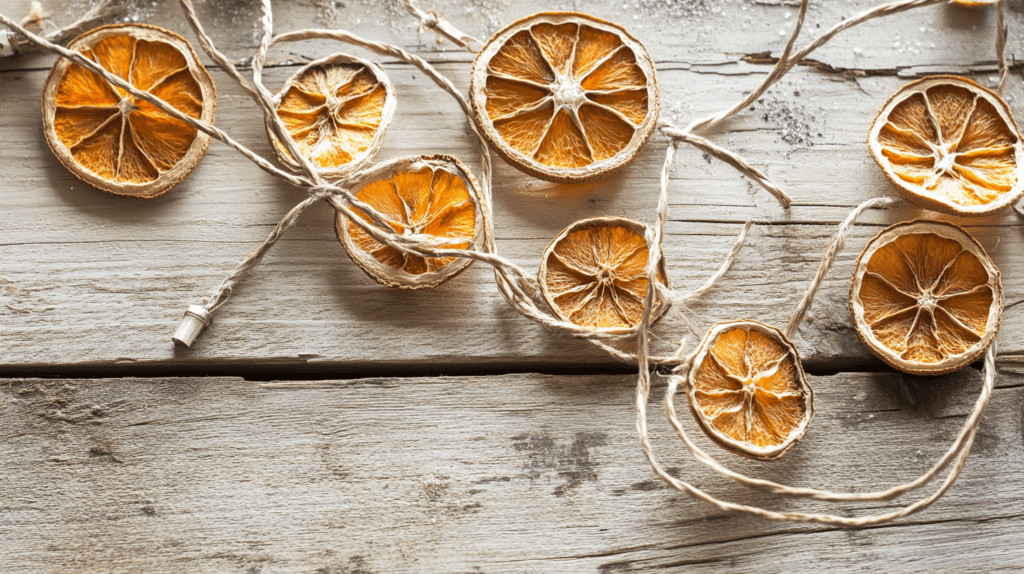
2. Bottle Vase with Twine and Dried Flowers

Any kind of glass beverage bottle – wine bottles, kombucha bottles, or even small soda bottles – can be upcycled into stunning, rustic vases with just a bit of creativity.
What You’ll Need: Cleaned glass bottles, jute twine, hot glue, and dried flowers or greenery.
Steps:
- Remove labels from the bottles and clean them thoroughly.
- Wrap twine around the bottle, securing it with hot glue as you go.
- Finish by filling the bottle with dried flowers, pampas grass, or eucalyptus stems.
Pro Tip: Use chalk paint or etching cream to give the bottles a unique and personalized finish that complements your space.
3. Tin Can Lanterns with Nature-Inspired Patterns

Give tin cans a second life by turning them into charming lanterns that add warmth and coziness to any space.
What You’ll Need: Tin cans, a hammer, a nail, paint, and candles or LED tea lights.
Steps:
- Clean your tin cans and remove any labels.
- Use the nail and hammer to punch patterns (like leaves or stars) into the sides of the cans.
- Paint the cans in earthy tones or metallic shades.
- Place a candle or LED tea light inside and enjoy the soft glow.
Pro Tip: Use cans of different sizes to create an eye-catching centerpiece or outdoor display.
4. Mosaic Mirror Frame from Broken Dishes

Don’t throw away broken ceramics—turn them into a stunning mosaic mirror frame instead!
What You’ll Need: A plain wooden frame, shards of broken dishes, grout, and adhesive.
Steps:
- Arrange the ceramic pieces on the frame to find a pattern you love.
- Glue the pieces down, leaving small gaps between them.
- Fill the gaps with grout, smoothing it over with a spatula.
- Wipe away excess grout and let the frame dry completely.
Pro Tip: Use colorful ceramic pieces for a vibrant look or stick to neutral tones for a more minimalist vibe.
5. Hanging Mobile from Driftwood and Bottle Caps

Combine natural driftwood with colorful bottle caps for a whimsical, eco-friendly mobile that’s perfect for any corner of your home.
What You’ll Need: A piece of driftwood, bottle caps, string, and beads or small shells.
Steps:
- Paint or decorate the bottle caps as desired.
- Punch a hole in each cap and string them together with beads or shells in between.
- Tie the strings to the driftwood and hang your mobile near a window or in a cozy nook.
Pro Tip: Add natural elements like feathers or dried flowers for extra charm.
6. Fabric Scrap Wall Hanging

Turn leftover fabric into a beautiful, textured wall hanging that adds personality to your space.
What You’ll Need: Fabric scraps, a wooden dowel or branch, and scissors.
Steps:
- Cut your fabric scraps into strips of varying lengths.
- Tie the strips onto the dowel or branch, layering them for a cascading effect.
- Trim the ends to create a symmetrical or uneven look, depending on your style.
Pro Tip: Mix in macramé knots or braided fabric for added texture and dimension.
7. Wine Cork Coasters

Wine corks make for durable, rustic coasters that are both functional and decorative.
What You’ll Need: Wine corks, glue, and a circular or square corkboard base.
Steps:
- Cut corks into slices or use whole corks for a chunkier look.
- Arrange them in a pattern (circular, hexagonal, or random) on the base.
- Glue the corks securely in place and let them dry completely.
Pro Tip: Seal the finished coasters with a waterproof finish for extra durability.
8. Upcycled Cardboard Storage Boxes

Cardboard boxes can become stylish, functional storage solutions with just a bit of effort.
What You’ll Need: Old cardboard boxes, fabric or kraft paper, glue, and twine.
Steps:
- Cut the top flaps off the boxes if needed.
- Cover the box with fabric or kraft paper, securing it with glue or tape.
- Add eyelets and robe handles for a decorative touch.
Pro Tip: Use boxes of varying sizes and neutral fabric tones for a cohesive, minimalist look.
9. DIY Rope Bowl from Recycled Cardboard and Twine

Combine rustic charm with functionality by crafting a bowl from natural rope and recycled materials.
What You’ll Need: Cardboard, twine or jute, and glue.
Steps:
- Cut a circular base from cardboard and form walls using rolled-up cardboard or thick rope.
- Wrap the entire structure in twine, gluing it securely as you go.
- Add decorative handles or paint details if desired.
Pro Tip: Use thicker rope for a sturdier bowl or mix rope colors for a unique design.
Final Thoughts
Creating eco-friendly decor doesn’t mean sacrificing style or elegance, it’s all about reimagining everyday items with a bit of creativity and intention.
These nine projects prove that upcycling can be both sustainable and beautiful, allowing you to personalize your home while reducing waste. So why not pick a project, grab some materials, and start transforming “trash” into timeless treasures? Your unique creations will make your space feel more meaningful AND connected to the planet.