This post may contain affiliate links, including those from Amazon Associates. If you make a purchase through these links, I may earn a commission at no additional cost to you. Learn more about our affiliate policy.
One of my biggest guilts is when food goes to waste. I see homesteaders canning huge batches of their homegrown vegetables and fruit and wonder, how can I do the same?
Canning can feel like a big leap when you’re new to homesteading, especially in a small apartment or backyard. I used to think it was my only option for saving my harvest, but I’ve learned there are easier ways.
This post is for us beginners, the ones dreaming of a more self-sufficient kitchen, who need simple ways to keep our own harvests or bounty from the farmer’s market alive. I’ve found some methods to preserve homegrown food without canning, and they’ve brought me such peace of mind knowing I can stretch those precious flavors without stress.

From quick pickling to freezing, these are the ways I’ve leaned on to feel in control, even in my rental kitchen. Let’s walk through them together, I promise it’s easier than it seems!
These methods don’t need fancy equipment, just everyday items you likely have. Each one offers a way to keep your harvest fresh and tasty, tailored for small-space homesteaders.
Quick Pickling

Quick pickling is a fast way to turn your veggies into tangy, crunchy bites without the hassle of canning. It’s perfect for small batches from your garden, adding flavor while extending shelf life. The vinegar keeps spoilage at bay, and you get a tasty snack or side in just hours—no waiting weeks like with traditional pickles.
- What You Need: Vinegar (white or apple cider), water, salt, a jar.
- How To: Mix equal parts vinegar and water, add a tablespoon of salt, a tablespoon of sugar or honey per cup, heat until dissolved, pour over sliced veggies in a jar. Cool, then refrigerate.
- Best For: Cucumbers, radishes, carrots. See my 7 quick pickled vegetable recipes for urban homesteaders for more ideas.
- Storage: Keeps in the fridge for 1–2 months.
- Benefits: Preserves nutrients, adds zesty flavor, and takes less than an hour to prep.
Freezing

Freezing is one of the simplest ways to save your harvest, locking in freshness with almost no effort. It’s great for apartment dwellers with a freezer or backyard growers with extra produce, keeping fruits and veggies ready for cooking anytime. You’ll save money on groceries and enjoy your garden’s taste even in winter.
- What You Need: Freezer bags, a sheet pan or tray, optional pot for blanching.
- How To: Wash and chop produce. Blanch veggies (boil 2–3 minutes, then ice bath) or skip for fruits. Freeze on a tray, then bag.
- Best For: Berries, green beans, tomatoes.
- Storage: Good for 6–12 months.
- Benefits: Retains vitamins, stops waste, and makes meal prep a breeze.
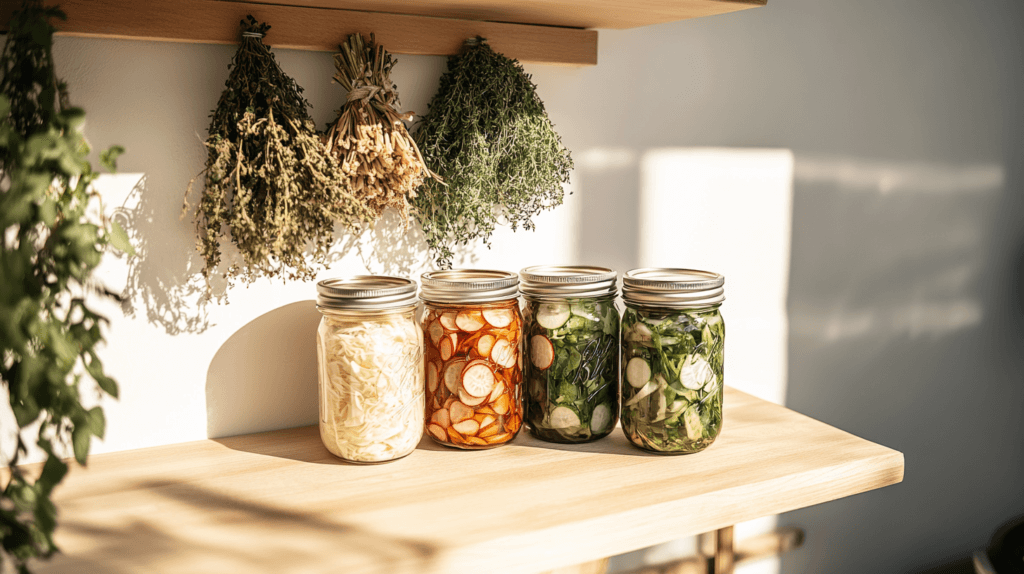
Drying Herbs

Drying herbs lets you store that fresh garden flavor in a compact way, no special gear needed. It’s ideal for small spaces because your herbs shrink down to fit in a jar, perfect for seasoning all year. Plus, it intensifies their taste, giving your dishes a boost with just a pinch. I’ll share more details in my next post, so stay tuned.
- What You Need: Twine or string, a dry spot to hang.
- How To: Tie herb stems in small bundles, hang upside down in a warm, airy place. Check after 1–2 weeks.
- Best For: Basil, rosemary, mint.
- Storage: Store in jars for up to a year.
- Benefits: Saves space, enhances flavor, and cuts down on store-bought spices.
Fermenting

Fermenting transforms your veggies into tangy, gut-friendly foods with minimal setup. It’s a natural preservation trick that works in any kitchen, turning humble cabbage or carrots into something special. You’ll get probiotics for your health and a unique flavor that store-bought can’t match.
- What You Need: Jar, salt, water, optional spices.
- How To: Mix 2 tablespoons salt per quart of water, submerge chopped veggies in a jar, weigh down (e.g., with a clean rock or weight), cover loosely. Let sit 3–7 days, taste daily.
- Best For: Cabbage (sauerkraut), carrots.
- Storage: Refrigerate for 1–3 months after fermenting.
- Benefits: Boosts nutrition, adds tangy depth, and needs no cooking.
Making Infused Oils

When you’ve dried your herbs, you can infuse olive oil with them! Infused oils capture your herbs’ essence in a bottle, perfect for cooking or drizzling. It’s a low-effort way to preserve that doesn’t take up much room, which is a great project for apartment homesteaders. You’ll have a homemade ingredient that elevates meals and feels a bit fancy, all from your garden.
- What You Need: Olive oil, jar, dried herbs.
- How To: Dry herbs fully, place in a jar, cover with oil. Let sit 1–2 weeks and strain.
- Best For: Rosemary, thyme, oregano.
- Storage: Keeps in the fridge for 1–2 months.
- Benefits: Enhances dishes, preserves herbs simply, and adds a gourmet touch.
Making Fruit Leather

Fruit leather turns extra fruit into a chewy, sweet snack with just a few steps. It’s perfect for small harvests, reducing waste and giving you a healthy treat to grab on the go. Drying concentrates the fruit’s natural sugars, making it a kid-friendly (or adult-friendly) way to enjoy your garden.
- What You Need: Blender, baking sheet, parchment paper.
- How To: Puree fruit, spread thin on parchment, dry at 135°F in oven (6–8 hours) or in sunlight (1–2 days). Peel and roll.
- Best For: Berries, apples, peaches.
- Storage: Store in an airtight container for up to 6 months.
- Benefits: Cuts waste, makes portable snacks, and keeps fruit’s sweetness.
Start Preserving Today
These 7 methods from quick pickling, freezing, drying herbs, and the rest, give you simple tools to preserve your homegrown food, no canning needed. They’re made for small spaces and beginner hands, turning your harvest into something lasting.
Pick one to try with your next batch, you’ll see how easy it is to keep your garden going!