This post may contain affiliate links, including those from Amazon Associates. If you make a purchase through these links, I may earn a commission at no additional cost to you. Learn more about our affiliate policy.
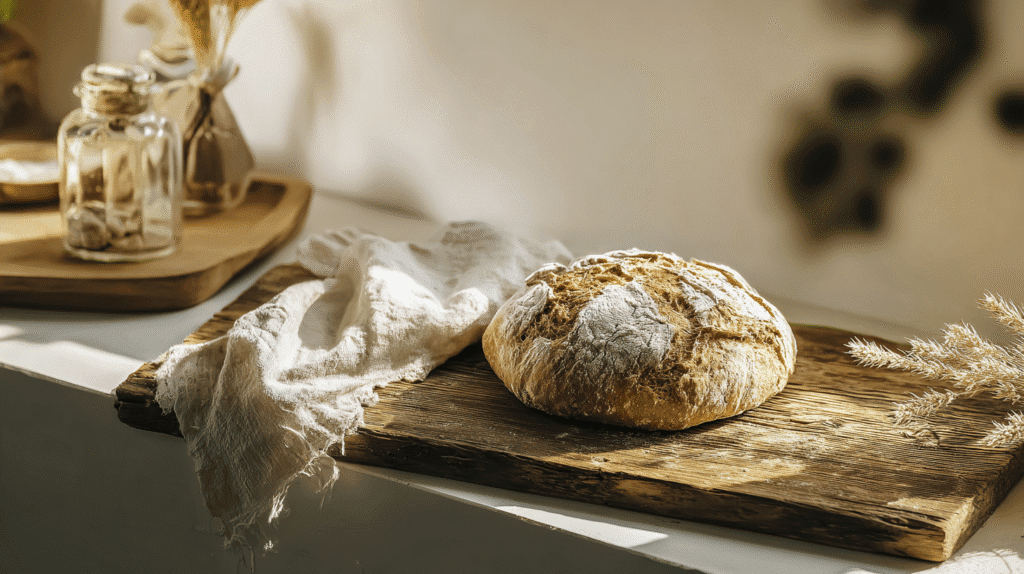
I still vividly remember the first loaf of sourdough bread I baked in my tiny apartment kitchen.
Early sunlight streamed softly through the window, catching the flour-dusted countertop. As I pulled the warm loaf from the oven, its golden crust crackling gently, I felt a deep sense of calm and triumph.
Baking sourdough bread is about reclaiming a sense of autonomy over your nourishment and creating a more self-sufficient kitchen overall.

If you’re living in a small apartment kitchen and longing to bake sourdough bread from scratch, you might feel intimidated or uncertain about how to begin.
I totally get it, and I put it off for so long thinking it was really complex and wouldn’t fit into my daily rhythm. But with a few thoughtful tips and a mindful approach, baking sourdough in a tiny kitchen can be not only achievable but truly transformative.
Let’s walk through each step slowly, so you can feel calm and confident every step of the way.
Why Sourdough Is Perfect for Small-Space Self-Sufficient Living

Before we dive into the details, let’s pause and consider why sourdough bread is a perfect practice for small-space homesteading and self-sufficiency:
- Minimal Ingredients: Flour, water, salt. That’s it. Simple pantry staples that you can keep easily even with limited storage.
- Deep Nourishment: Sourdough bread is easier to digest, filled with beneficial microbes, and deeply nourishing. It’s the essence of clean eating from your own kitchen.
- Sustainable Rhythm: Baking sourdough fits naturally into a slow, intentional routine. The fermentation happens gradually, without needing constant attention.
- Cost-effective and Sustainable: Homemade bread is affordable, zero-waste, and free of preservatives. It aligns perfectly with mindful, eco-friendly apartment living.
- Empowering and Healing: Baking sourdough reconnects you to ancestral skills, grounding you in the present and nurturing both body and spirit.
Essential Tools & Ingredients for Baking Sourdough Bread

When you’re starting out, it’s easy to think you need a fully-stocked kitchen with specialized baking equipment (that’s what I thought anyway).
The truth is much simpler than that. You can bake exceptional sourdough bread with minimal tools and simple ingredients. Here’s exactly what you need:
Minimal Equipment List:
- Mixing Bowl: Any sturdy bowl, ceramic or stainless steel, will do.
- Dutch Oven or Alternative: A sturdy Dutch oven helps create steam (I love my Lodge Dutch Oven), resulting in a golden crust. But you can also use:
- A covered baking dish
- A cast iron skillet topped with a metal bowl as a lid
- A baking stone or baking steel with an oven-safe tray of water beneath it for steam
- Sharp Knife or Razor Blade: For scoring the dough and allowing it to expand beautifully.
- Kitchen Towel: A simple cotton or linen towel for covering dough as it rises.
- Parchment Paper: To transfer dough cleanly to your baking vessel.
- Optional Extras: A bench scraper, proofing basket (or a simple bowl lined with a floured towel) or digital scale for exact measurements.
Essential Ingredients:
- High-Protein Bread Flour: Provides structure and a good rise when you’re starting out. Begin here, and later you can experiment with whole wheat, all-purpose or rye.
- Filtered or Dechlorinated Water: Ensures your starter and dough ferment healthily.
- Salt: Use sea salt or pink Himalayan salt for pure, balanced flavor.
Starting and Caring for a Sourdough Starter (Even in a Cold Kitchen)

A sourdough starter might feel mysterious, but it’s simply flour and water fermented by wild yeast and beneficial bacteria from your own environment (talk about local!)
Simple Starter Instructions (Day-by-day):
Here’s how to begin with just a jar, a spoon, and some patience:
Day 1: In a clean glass jar (pint or quart-sized works well), mix equal parts flour and filtered water by weight, about 50 grams each (roughly ¼ cup water and ⅓ cup flour). Stir until smooth. Cover the jar loosely with a piece of breathable cloth secured by a rubber band or rest the lid on top without sealing it. Let it sit at room temperature, ideally 68–75°F.
Days 2–5: Each day, discard half the starter and feed it again with 50g flour and 50g water. Stir well, scrape down the sides, and cover loosely again. You’ll start to notice bubbles, a tangy aroma, and gradual rise.
Day 6–7: Your starter should now double in size within 4–6 hours of feeding, with a soft, bubbly texture and pleasantly sour scent. If it passes the “float test” (a spoonful floats in water), it’s ready to bake with.
Cold kitchen tip: If your space runs chilly, tuck the jar into your oven with the light on, or place it near a warm appliance. You can also wrap the jar in a towel for extra insulation.
Once active, your starter can live in the fridge between bakes. Just feed it weekly and bring it to room temperature before baking again.
Making Sourdough Fit Your Apartment Lifestyle and Schedule
One common worry about sourdough baking is the time commitment. Here are some ways to make sourdough fit into your apartment life and busy schedule:
- Evening Mix: Mix your dough in the evening and let it ferment overnight. By morning, your dough will be ready to shape.
- Fridge Proofing: Proof (let rest and rise) shaped dough in the fridge while you work or sleep, and bake at your convenience.
- Batch Baking: Bake one or two loaves weekly and freeze slices, saving you time on busier days.
- Compact Setup: Keep your tools neatly together in a basket or a drawer to maintain a tidy workspace.
Step-by-Step Beginner Method for a Simple Sourdough Loaf

Let’s walk step-by-step through your first loaf:
Mix Your Dough:
In a large bowl, combine 3 cups (375g) flour, 1¼ cups (300g) filtered water, and ½ cup (100g) active sourdough starter. Stir until no dry bits remain. Let it rest for 30–60 minutes (this is the autolyse phase). After resting, mix in 1½ teaspoons (9g) salt until fully incorporated.
Stretch and Fold:
Over the next 2–4 hours, perform a gentle stretch-and-fold every 30 minutes to develop dough strength. The dough will become smoother and more elastic.
Bulk Fermentation:
Cover the bowl loosely with a cloth or lid and let the dough rise undisturbed for 4–6 hours (or overnight in a cooler kitchen) until it’s airy and expanded.
Shape the Dough:
Turn the dough out gently onto a floured surface. Shape it into a round or oval loaf and place into a proofing basket or bowl lined with a floured towel.
Final Proof:
Let the shaped dough rise for 1–2 hours at room temperature, or refrigerate overnight for a slower, flavor-enhancing cold proof.
Bake:
Preheat your oven and Dutch oven to 450°F. When ready, score the top of the dough with a sharp knife or lame. Transfer it into the preheated pot and bake covered for 20 minutes, then uncovered for 20–25 minutes until golden and crusty.
Cool and Enjoy:
Transfer the baked loaf to a wire rack and let it cool fully—at least 1 hour—before slicing. This helps set the crumb and makes cutting cleaner and easier.
Lauren from A Bright Moment has an excellent tutorial for a visual aid:
Common Beginner Mistakes and How to Avoid Them
If your first loaves aren’t perfect, that’s beautifully normal. Here’s gentle troubleshooting guidance:
- Starter Not Rising?
Check your feeding schedule, water temperature, and room warmth. Be patient; starters develop resilience over time. - Dense Bread?
Likely under-proofed or dough wasn’t stretched enough. Give dough extra time and more gentle folding. - Gummy Bread?
Bake longer, and let cool completely before slicing. - Dough Spreading Too Much?
Reduce water slightly next time and practice firmer shaping. - Flat, Pale Crust?
Preheat your Dutch oven fully and ensure steam is generated during the initial bake.
Each loaf teaches you something new—embrace the lessons with gentle curiosity.
Small-Space Storage Solutions for Starters, Tools, and Bread
In a small kitchen, thoughtful storage makes a difference:
- Starter Storage:
Keep starter in a small jar in your fridge, tucked into a corner or door shelf. - Tools Storage:
Gather your sourdough essentials into a single basket, drawer, or box for easy access. - Bread Storage:
Freeze sliced bread wrapped in reusable beeswax wraps or store whole loaves in breathable linen bread bags.
Make Sourdough Baking Part of Your Self-Sufficient Kitchen Rhythm
Let baking become more than cooking, make it a ritual that fits into your routine:
- Combine baking with weekly meal prep to save time and energy.
- Knead or fold your dough while listening to soft music, a podcast, or simply enjoying silence.
- Reflect on the simple beauty of crafting something nourishing with your own hands.
Closing Encouragement
You don’t need the perfect kitchen, special gadgets, or unlimited free time to bake nourishing sourdough bread. You simply need a willingness to start, patience to learn, and gentle curiosity.
Every loaf you bake, however imperfect, is an affirmation of your capacity to nourish yourself independently.
Every moment spent in mindful baking is a quiet act of reclaiming your sovereignty, your kitchen, and your wellbeing.
Your small kitchen can hold big dreams. Your hands can bake bread. And your heart can guide you every step of the way.